Heat Gun Coffee Roasting Notes
I recently made a post about building my DIY heat gun roaster and now that I’ve gotten a few roasts under my belt, I wanted to share some of what I’ve learned.
I’ve found that roasting with a heat gun is a bit different than what I’ve seen on more traditional drum roasters. I started by trying to follow some example profiles I’ve found online, but all the profiles I found were for drum roasters. The first difference I noticed was the turning point with the heat gun roaster seemed almost instant and the RoR (rate of rise) was crazy high at first. But over time, the curve flattens out and the RoR starts to fall. The rest of the roast looks similar to what you’d expect.
Starting Temperature
While I can’t recommend an exact starting temperature, I’ve found that I generally need to roast with a higher heat than I think. I usually start between about 900°-1000°F on the heat gun. For my setup, this translates to about a 500°F environment temperature reading on the thermocouple. Because my environment temperature sensor is about halfway between the heat gun and the beans, I usually assume the actual environment temperature at the point the air hits the beans is a bit lower than the reading. I should note that the actual starting temp will vary for everyone based on many factors including:
- Temperature sensor position
- Ambient air temperature
- Distance of the heat gun from beans
Drying Phase
In previous roasts I mostly kept the highest temp the whole roast, and it worked ok, but roasts were hitting first crack pretty early, and were tasting a little flat. In these roasts I tried starting at a slightly lower temp and extend the drying time a bit, so that we wouldn’t fly through the caramelization phase to quickly. So keeping an eye on your RoR drop, I’ll slowly start to increase my temps by about 20 degrees at a time before I near the end of the drying phase as we go into caramelization. Slowing down the drying a bit seemed to add some extra flavor to the cup.
Development
I was aiming for about a medium (City/City+) roast, but wanted to vary my development time and drop temperatures a bit, so I could better understand the taste difference.
While they all turned out pretty good, in my opinion, as a coffee roasting novice, batch number 3 actually tasted the best. Caramel, chocolate and light fruit notes, without much bitterness.
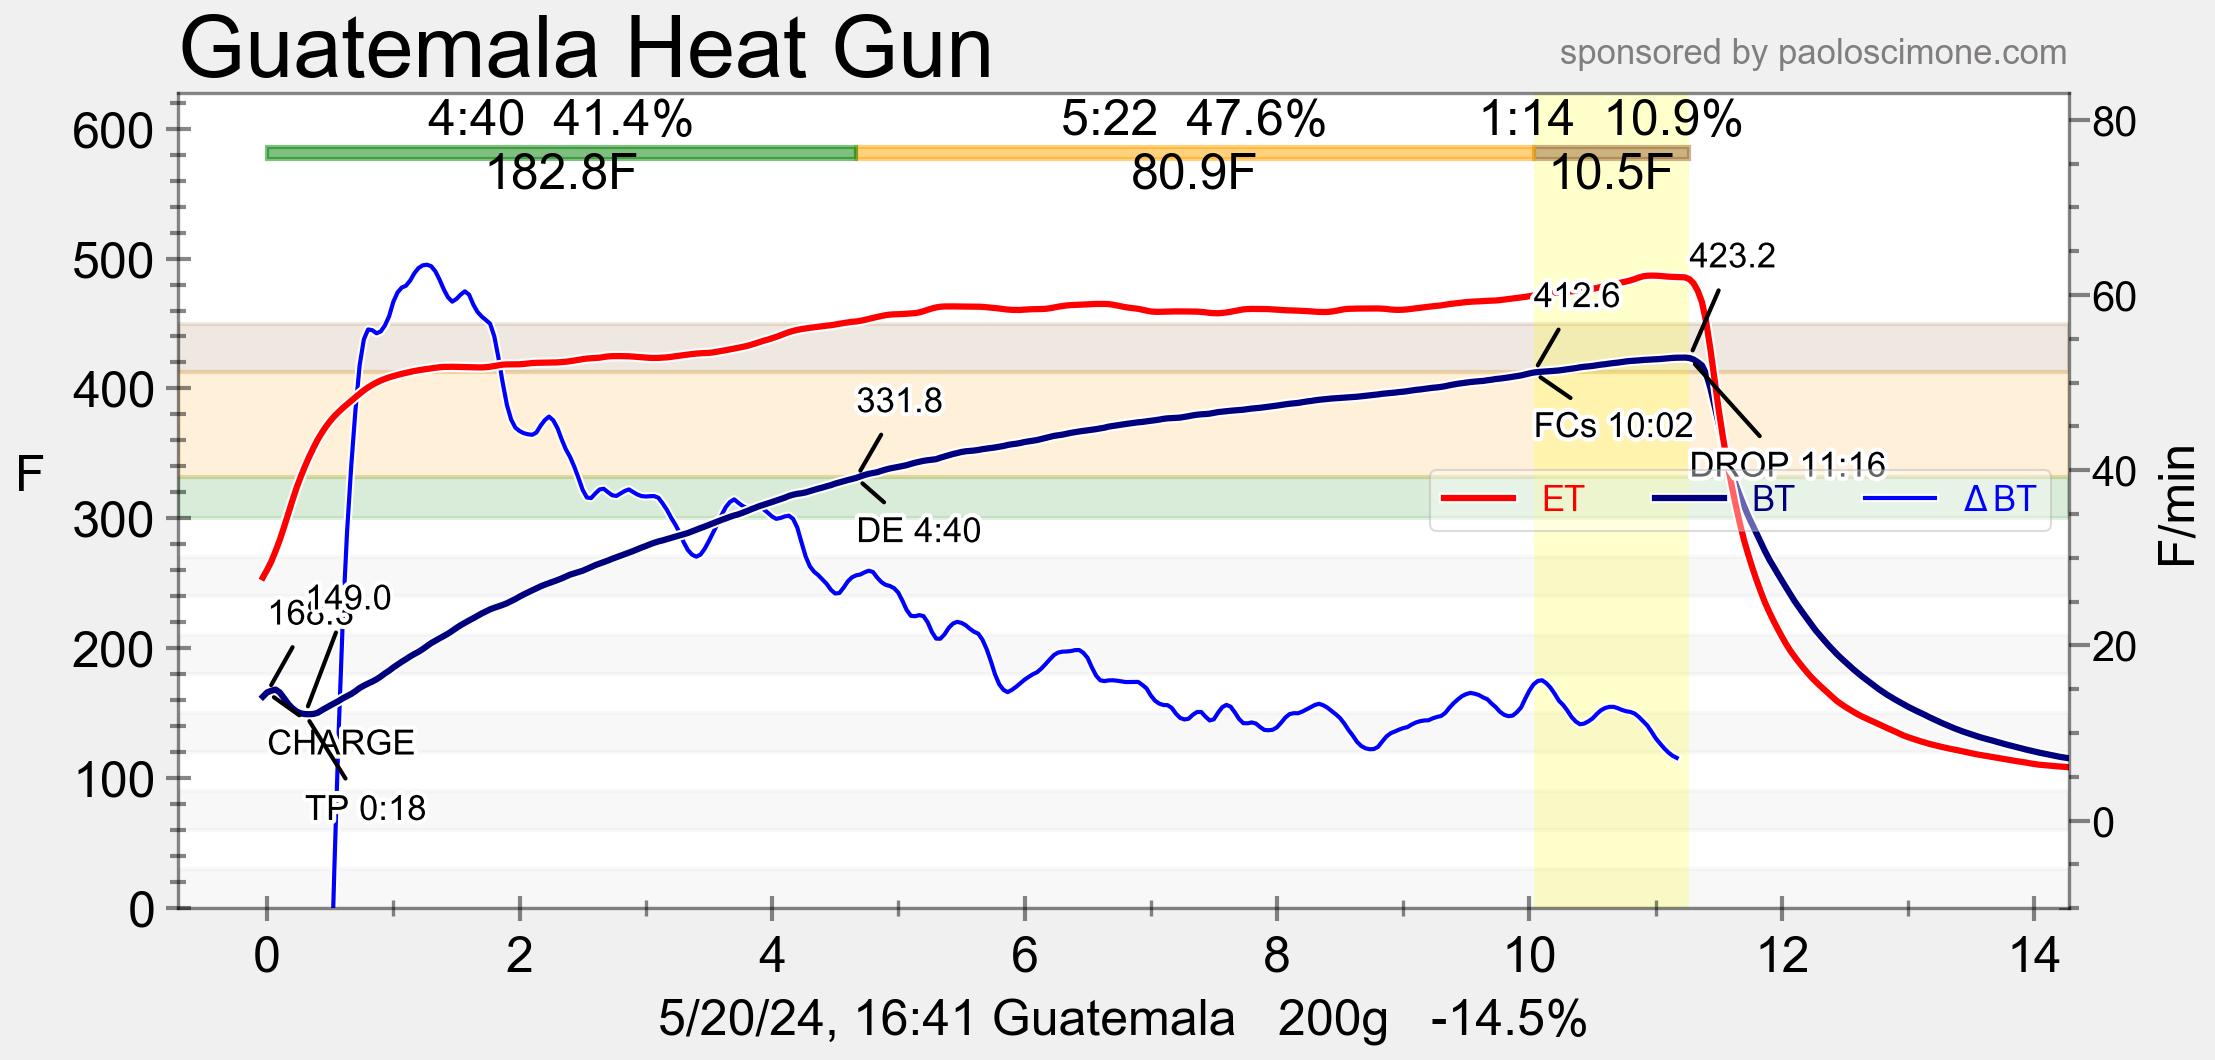
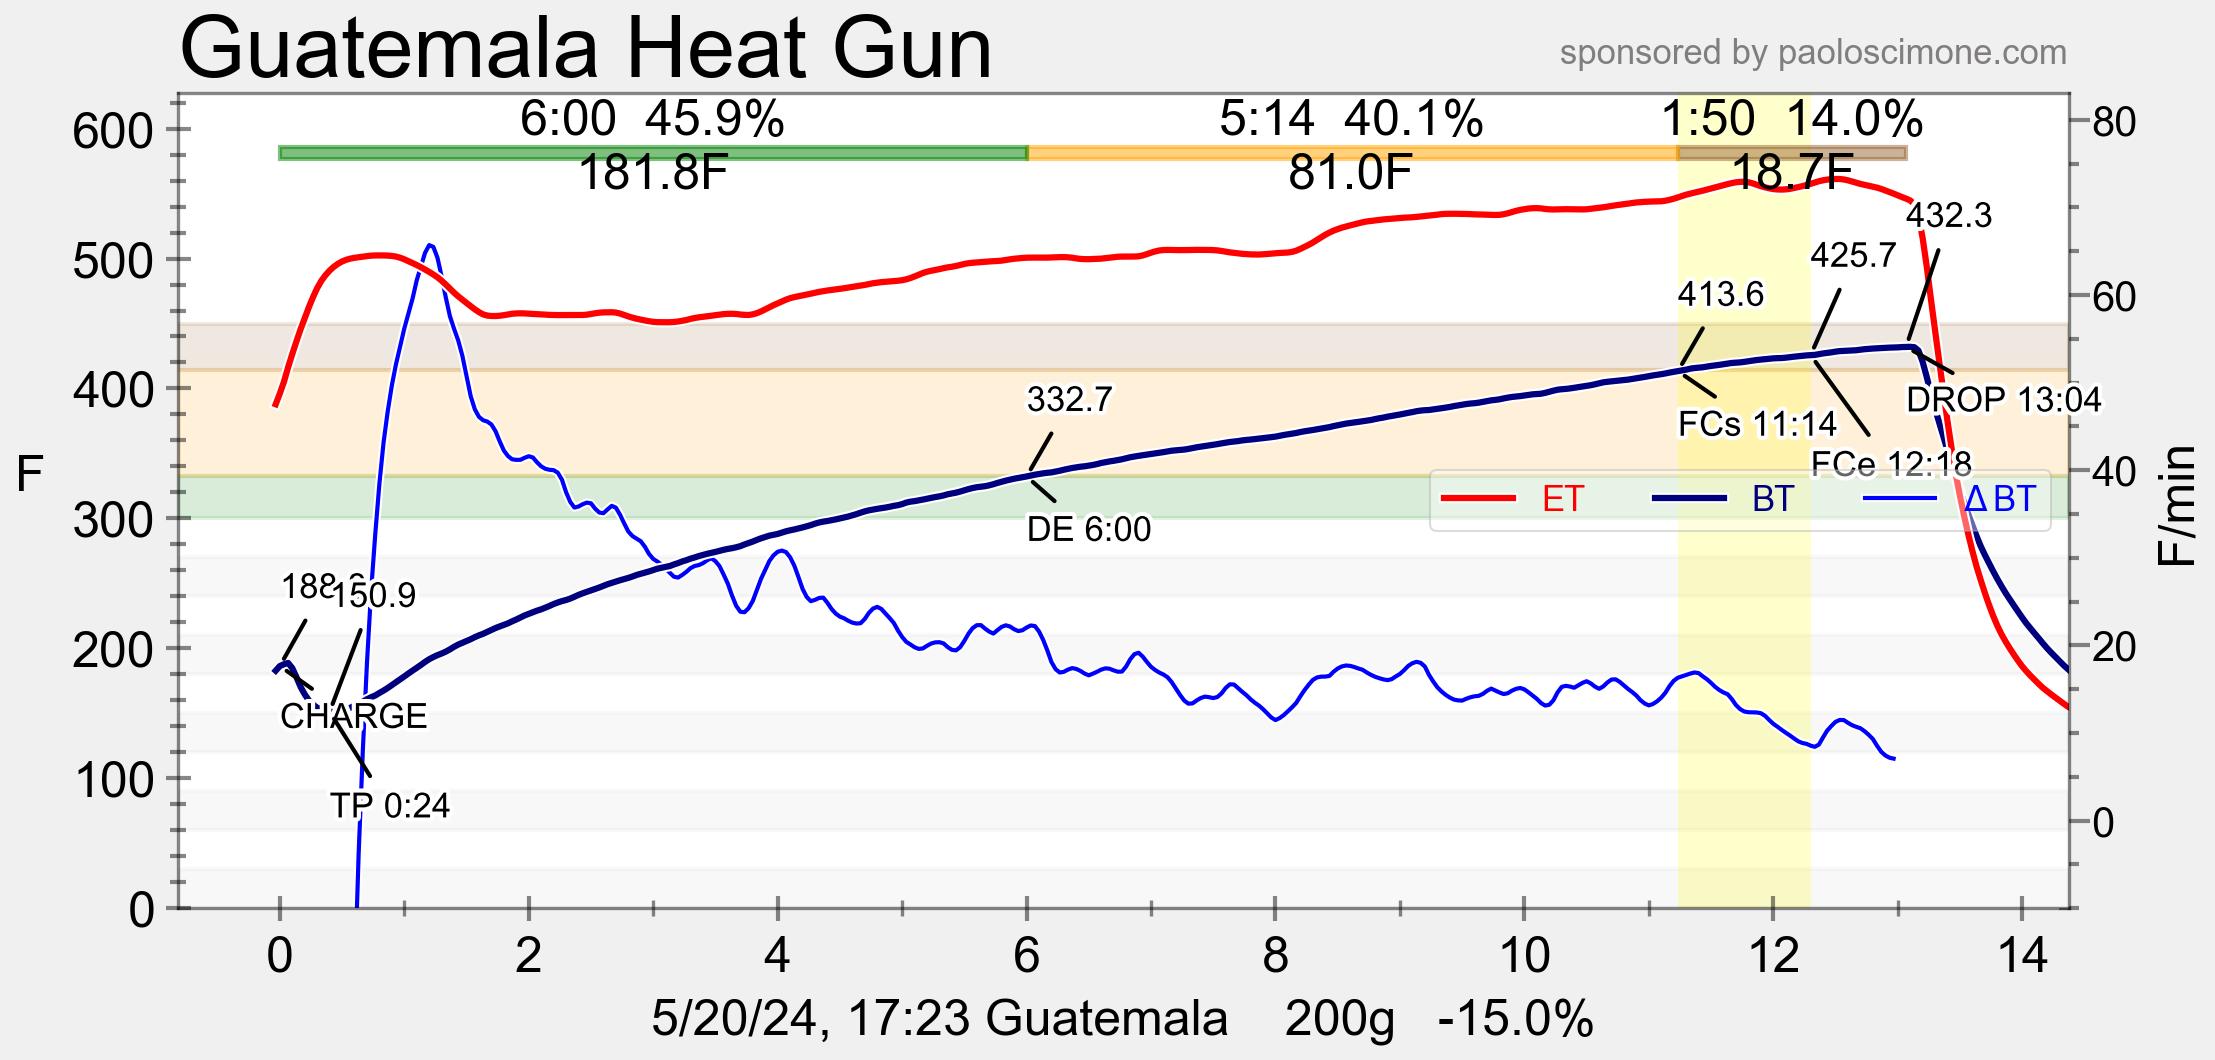
Below are the Artisan profiles for my 3 test roasts. The only strange thing I can’t quite figure out is why I needed so much extra heat on batch three, but it ended up with a longer development time, and lower drop temp than batch 2.
Guatemala - Batch 1
Guatemala - Batch 2
Guatemala - Batch 3
